Creating and editing scorecards using a blank template.
Creating forms plays an important role in a quality software solution, as it is the core of the system’s evaluations and reporting features.
The following article will demonstrate to the user how to create a form using the blank template provided on the “Forms Administration” page in CYF Quality.
Log in at https://quality.cyf.com/login.php
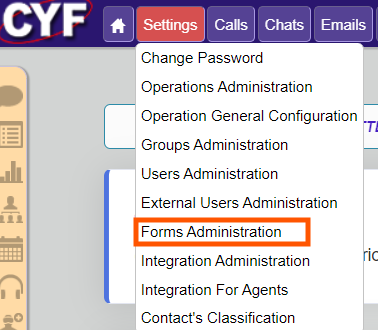
Forms Administration
Once log on navigate to “Settings” “Forms Administration”.
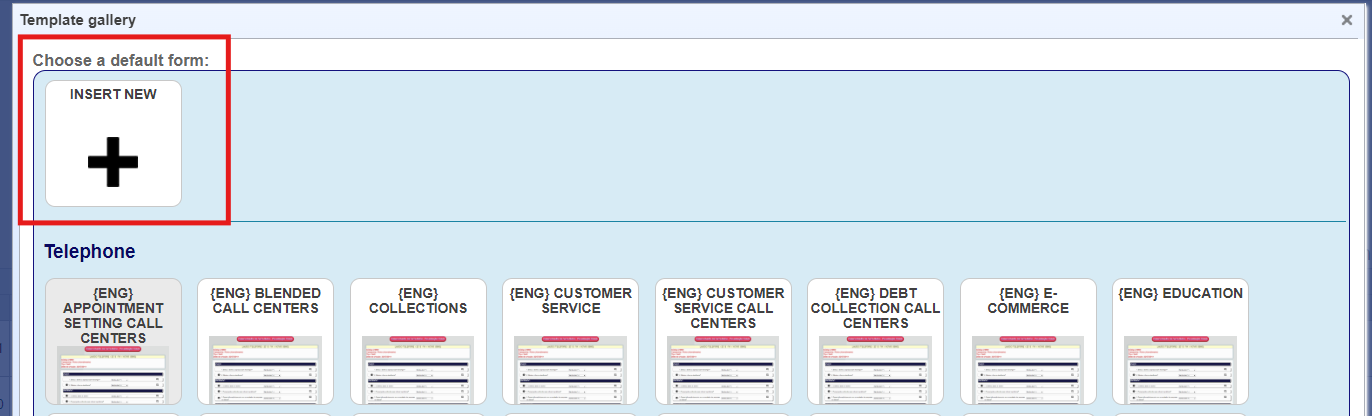
Click on “New Contact Evaluation Form” as shown in the image below.

Select the “Insert new”.
Form Criteria:
The next page allows you to name your form and choose the correct criteria that the form should have.
In the dropdown menu for channels, you can select which channel this form will be used for.
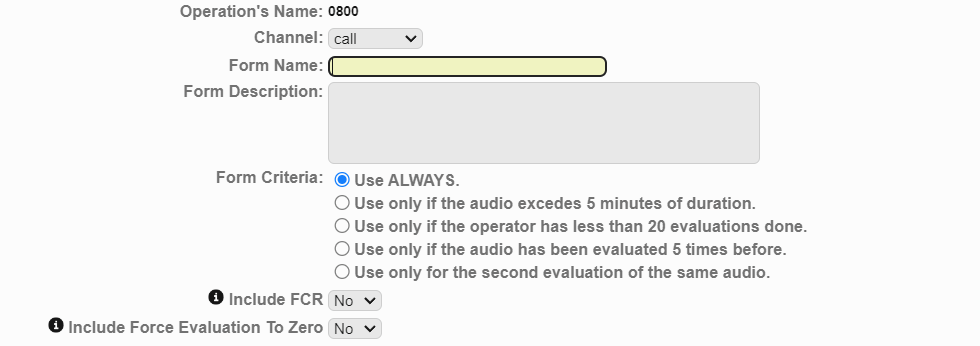
Next, provide your form’s name as well as a brief description of its purpose and where it will primarily be used.
- Select the Form Criteria by clicking on any of the option buttons.
- Select No/Yes to include FCR.
- Select No/Yes to include force evaluation to zero.
FCR (First Call Resolution)
FCR (First Call Resolution) is a performance indicator in call centers that measures the ability to resolve the customer’s request on the first contact, without the need for additional calls or transfers. If the issue is resolved immediately and the customer confirms this in the satisfaction survey, the agent receives a full score. A high FCR rate improves the customer experience, reduces operational costs, and increases service efficiency.
By enabling the FCR function in the evaluation form, at the end of the service, an option will appear for the monitor to assess whether the issue was resolved on the first call. Additionally, after multiple evaluations, it is possible to analyze the team’s performance in this aspect through the First Contact Resolution report, allowing the identification of opportunities for improvement in customer service.
Force Evaluation To Zero
In these cases, regardless of the fact that the agent may have obtained a high score, if the agent makes a mistake in one of the critical failures, this option can be selected, and it will force the result to zero. This is demonstrated in the images below.


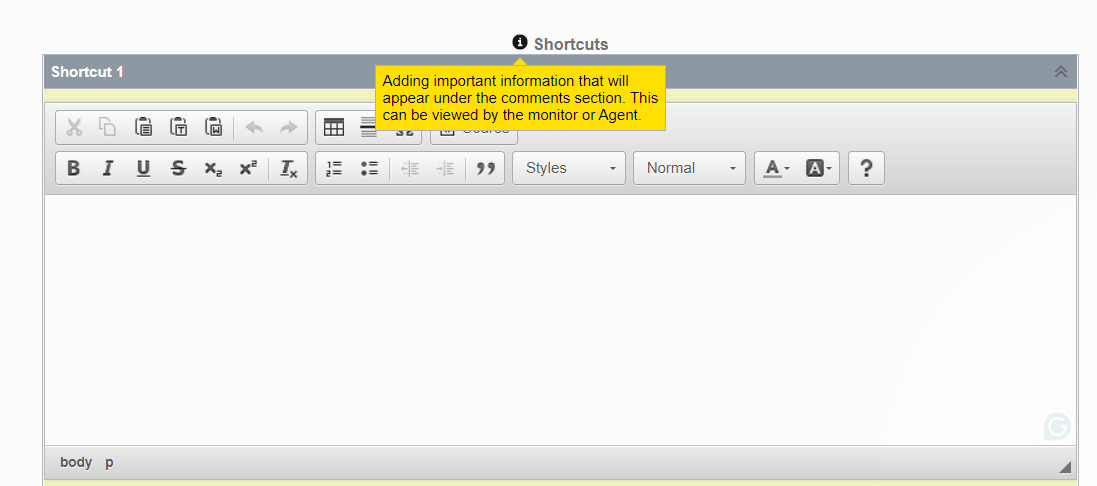
Shortcuts
During the monitoring and evaluation process, monitors often need to add comments to complement the analysis. In some situations, the result of the evaluation may be just a comment or a specific response. To make this process more efficient, comment shortcuts allow you to save and reuse frequent observations, quickly inserting them during the evaluation. This reduces the time spent typing and maintains consistency in feedback. You can add up to 5 comment shortcuts (Shortcuts) to make the process easier.
Creating Items
After saving the form, you will return to the form manager.
To edit the form, select the pen icon.

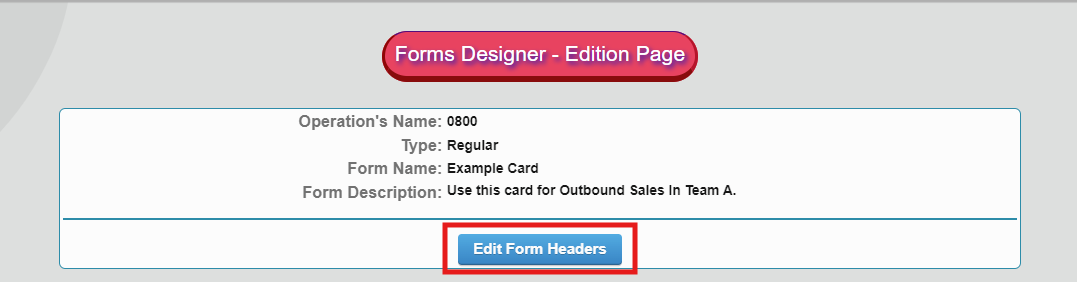
The form editing page consists of the following:
The first field is where you will see the form’s name and the details entered previously. You can edit the form’s header in this field by clicking the “Edit form headers” button.
In the next field, we will start creating the form.
Click on “Insert new.”

A pop-up will appear as shown in the image below. Now, we will carefully examine each type of item.
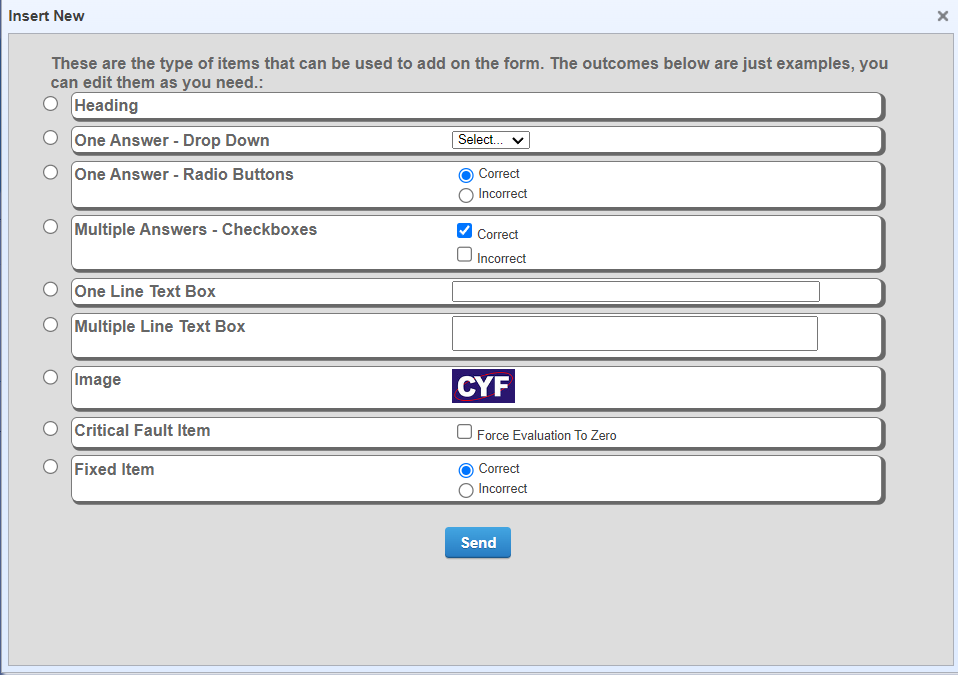
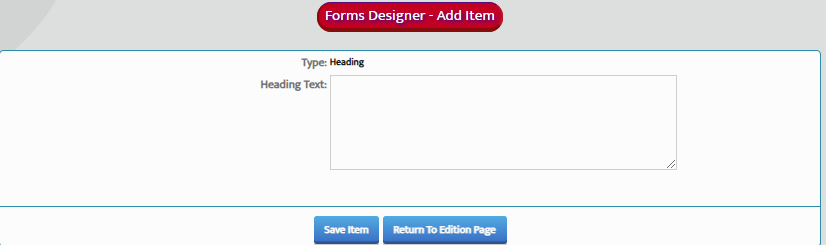
Heading
Here we will create the heading of a particular section, for example. Opening or Greeting or Introduction are just some examples that can be used as a heading.

Click on the “Save” button.
Here you can name your heading.
The page will go back to and display the newly created “Heading”

Next we will continue to insert a new item.
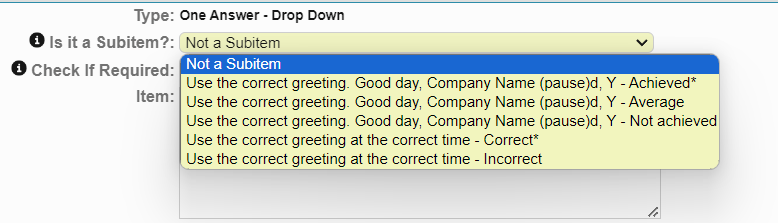
One Answer (Dropdown)
The dropdown menu allows you to choose from several options in a compact and organized manner. In this example, we are using “Correct” and “Incorrect”. To use it, click on “Create new” and select the desired option. When you click the corresponding button, the menu will display different choices, each with a brief description to make selection easier.
After making your selection, you will be directed to the next page, where you can create the item as needed.

On the following page, we will create the item.
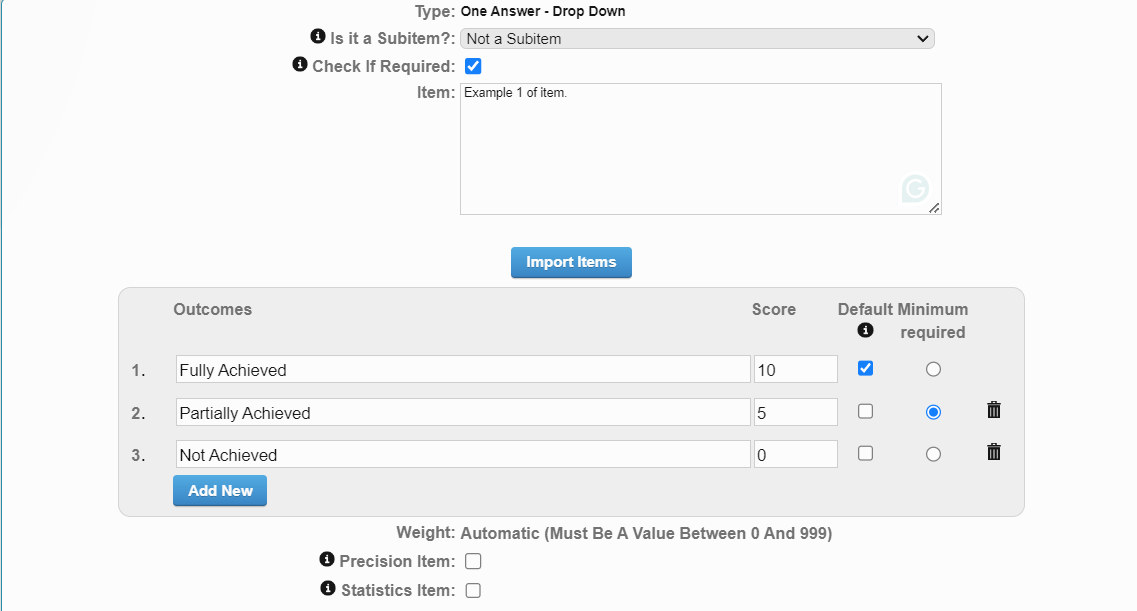
The first option on the page is “Is it a sub item?” The answer will be NO because this will be your main item. You can create a sub item after creating the main item. We will demonstrate this later in the article.
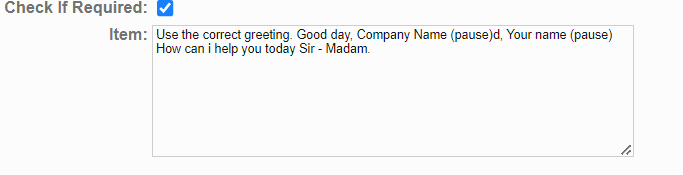
The option “Check if required?” makes the selection of a result mandatory. This means that if this option is enabled, the monitor cannot set the result as “Not Applicable” without first choosing a valid alternative. This ensures that the user will be required to select a result before proceeding, guaranteeing that no answer is left open.
Now, provide a description for the item. See the example below.
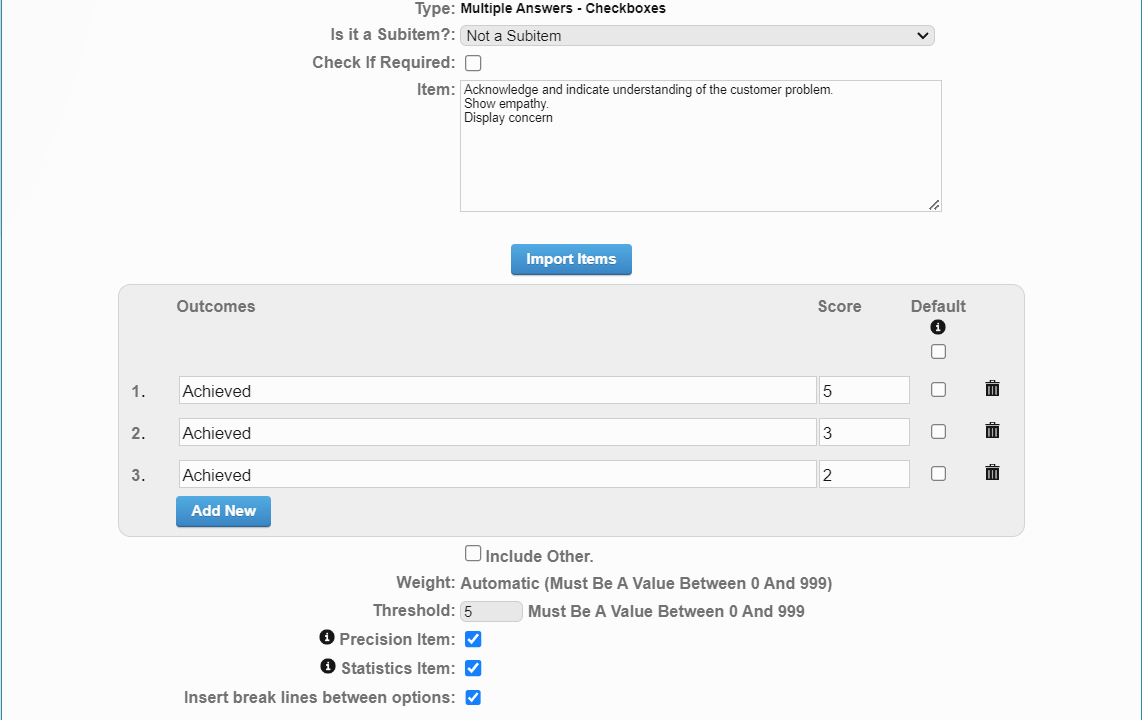
In the next step, we will create “Outcomes” and “Score”. See the image demonstrating below.
- Click on any of the answer boxes and add one of your choice, such as “Achieved” ,”Average” or “Not Achieved” etc.
- Next to it, you can assign a score for each answer.
- You can choose which one should be your default. This simply means that, when viewing the form, you will have the default option you selected.
- Additionally, you can add the minimum acceptable score for this item.
- You can also delete answers or add more answers by clicking on the delete icon or the “Add New” button.
Example in the system:
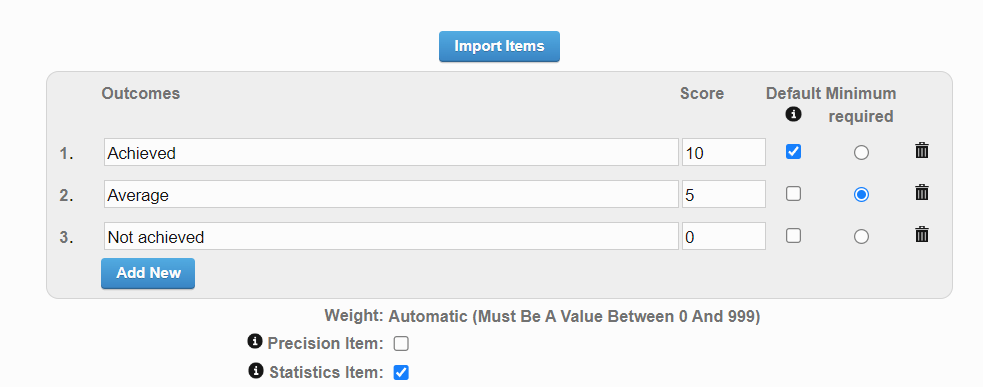
Precision Item
As shown in the image above, a precision item is an item considered fundamental to the performance or quality of the process or product. By checking the box next to “Precision Item,” this item will be highlighted in the list of critical failures in the report, indicating its importance. If this item fails, it will have a significant impact and should be treated with priority.
Statistics Item
A statistical item is a type of item whose result will be represented graphically in a pie chart within the “Statistics” report. When this option is chosen, the data related to this item will be analyzed visually, making it easier to interpret the statistical information.
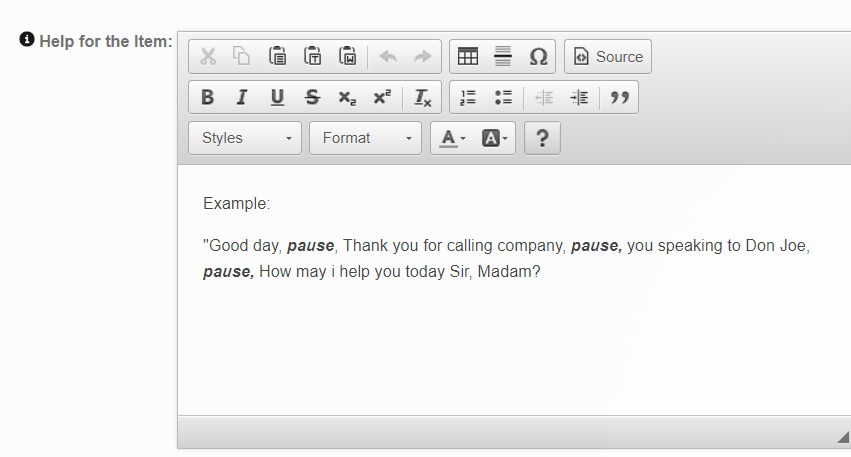
Help for the item
This section allows the user to provide a brief description of what is needed for this item. This feature can be used to guide the agent on what is expected when they receive the completed evaluation report during their evaluation.
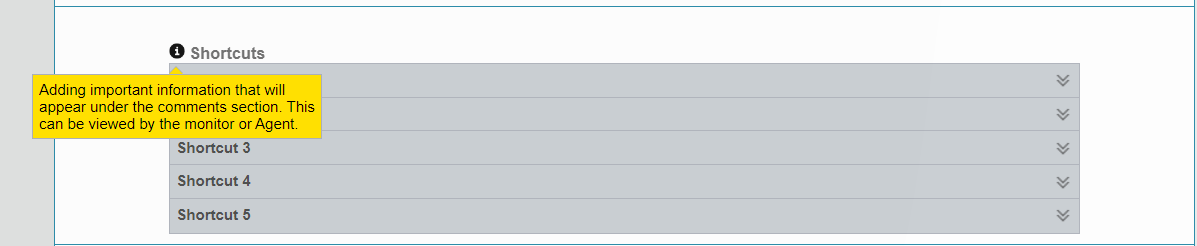
Shortcuts
The shortcut feature is a useful tool for adding comments. This is especially helpful when the evaluator uses the same comment repeatedly. You can add up to 5 comments, and when the evaluation is completed and the monitor needs to add the comment, they simply click on the correct comment, and it will automatically be added to the evaluation.
Save the item by clicking the “Save” button at the bottom of the screen.
The user will return to the form page, where they can see the newly created item. The user can edit the item again if desired by clicking the pen icon and editing the item.

The user can also preview the form as they progress by clicking the “Preview the form” button.
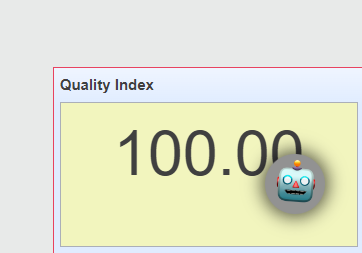
You can also check the score as you go and add headers and items. Remember that you can use any score for your example, such as 10, 50, 100, etc. The system will always reflect the percentage score up to 100%.
The pop-up with the score will appear in the lower right corner of the page. You can change the scores and see the changes as you modify them.
You, the user, can continue adding items and editing until the form is completed.
Radio Button
A radio button is a type of selection field where the user can choose only one option from several available ones. It is used when only one answer is required.

Multiple Answers (Checkboxes)
In the multiple answer box, the user can select several options, and each selected answer must have a score assigned to contribute to the total value. Example:
Result 1 = 5
Result 2 = 2
Result 3 = 3
The total above will be 10. If the user makes a mistake, for example, in Result 2, they will lose the total for that item, and their score will be 8 in this case.
You can click “Preview the form” again to view the form and check the score as well.
One-line and Multiple-line Options
In the one-line result option, the user must enter a specific description for the created item. This description serves only as a comment or explanation about the item and does not affect the evaluation score.
The same applies to the multiple-line option, but the difference is that you can add more than one description on separate lines.
It is important to remember to check the character limit specified for each line. If the description exceeds this limit, you will not be able to type all the content, as the field will only accept the maximum number of characters allowed.

Using The Image
The image below is purely for the purpose of customization.

Critical Fault
The selection of this item will force the evaluation to zero, regardless of the score the agent has accumulated throughout the evaluation.
![]()
Fixed Item
When the Fixed Item option is enabled, it changes how the score is treated. For example, if the total evaluation score is 150 points and the user loses 10 points on an item, they will still have a score of 93.4%, because the 10 points lost represent a proportional part of the evaluation.
However, if a Fixed item is selected and the user fails that item, they will lose all 10 points related to the final score, resulting in a final score of 90%. In other words, the item does not work as a percentage. If failed, the impact on the score will be subtracted from the final score rather than being proportional.

Adding Sub Items
As mentioned earlier in the article, we will demonstrate how to create sub items.
First, we create a main item.
Now we will continue adding sub items to this item. See the image below. Make sure to choose the correct item that was created.
In this case, it will be “Does the agent handle the service objectively?”
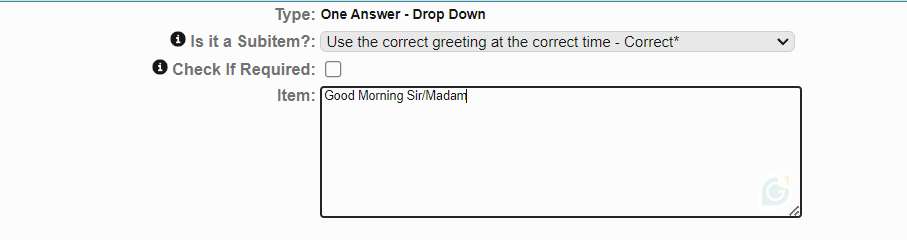
- We will add the sub item as shown in the image above. Click “Save item” after creating the sub item.
- The sub item will appear at the bottom of the main item.
- Click the “Preview” button of the form, and you will be able to see the main item and its sub item. Remember that if the agent makes a mistake on the main item, the sub items will not be accessible. They will automatically collapse.
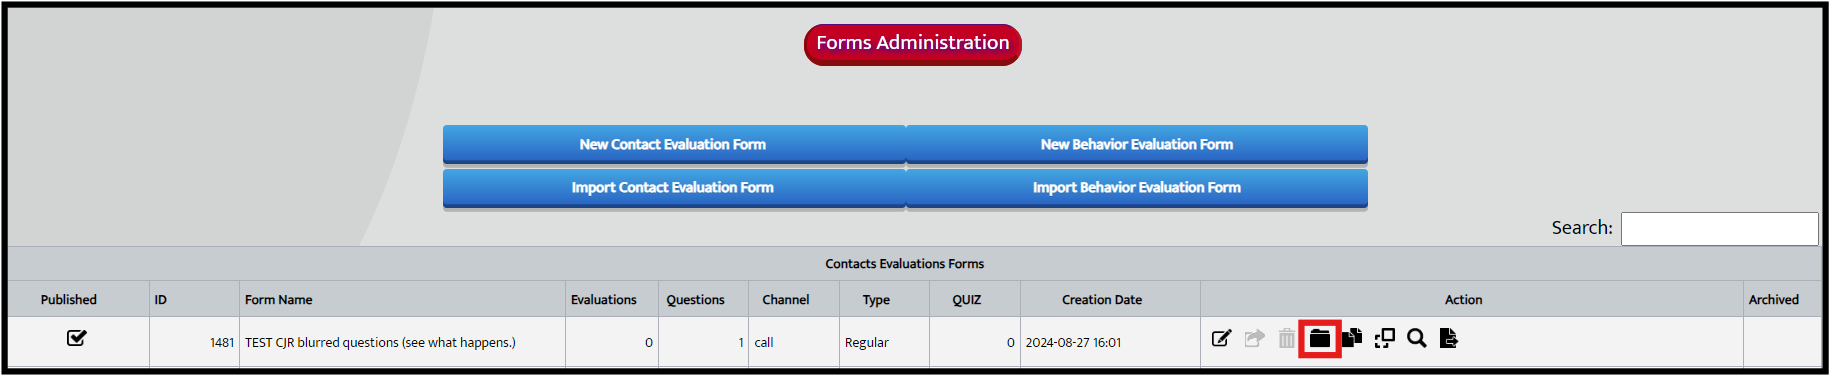
Publishing the Form
To use the created form, you need to publish it. Please note that once published, the form cannot be deleted. The form can only be “Edited” and “Archived” as shown below with the archive option.
If you wish to edit a published form, click the “Duplicate” icon. With this copy, make the desired changes and publish it again.
This concludes our Knowledge Base article on “How to create a form using a blank template.”
If you need further assistance, feel free to contact us at support@cyf.com.